Pages

Tuesday, February 22, 2011

Fabric Stamping Tutorial

Since I've been blessed with a super adorable son, I like to come up with ideas for decorating the things I've made for him! It seems like flowers and ribbons are a lot easier to use for embellishment purposes than boy ideas, though. After lots of brainstorming, I decided to try fabric stamping to make some cute things for my little boy.

Here is an example of what I've made so far:
Please note, I did make the shirts (except for the front right one). I made them all from old t-shirts and drafted my own pattern. I'm working on getting the tutorial together for that project!

What will you need to stamp your own shirts? Find (or make!) a pile of plain t-shirts.
Get some scraps, too so you can practice! This stuff is permanent.

I used fabric paint. Not the puffy stuff.

I used foam stamps. I found some fun 'boy-appropriate' ones at the craft store. I spent around $10 for the paint and the stamps.

I used a brush to paint the stamp. I did this to ensure it was evenly coated with paint.

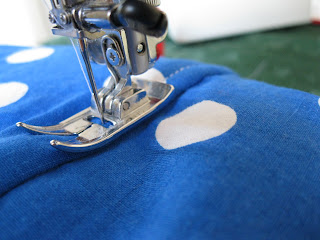
Then I stamped my fabric! Practice on scraps first. Make sure the fabric is FLAT. If you're stamping a shirt, put a piece of cardboard between the front and back to prevent bleeding.

I did practice and my images still didn't turn out perfectly, but I think it gives them character. I do recommend pulling up the stamp quickly, yet not TOO suddenly or you'll splatter the paint.

Hang on to your leftover paint. I've got some other ideas coming up for stamping more boy items you can sew!

Monday, February 21, 2011

Newborn Winter Hat Tutorial


Friends of ours are having a baby girl any day now. It's cold here! All babies should have warm heads, so I wanted to make a stylish winter hat as a gift!

I started with a piece of white polar fleece, size 9" x 16". I had to go back and trim some off the height, so I recommend cutting more like 7" x 16".
Fold up the bottom about 1", pin in place, and sew.


Then fold the whole hat in half (right sides together) and sew it to make a big tube. Pinch the top of the hat so it makes an "X" and pin it in place (see next picture).
Sew from the edge of each portion of the X to the middle. Make sure that one of the seams goes through the middle or there will be a hole at the top of the hat.
Here's the top view of the "X":
To make the flower, cut three pieces of polar fleece in different sized flower-shaped pieces.
Stack them and put some small stitches through the middle.
Turn the hat right side out.
Attach the flower to the brim.


All finished and ready for gifting! Pretty cute...I might have to make one for myself!

Friday, February 18, 2011

Laptop Case Tutorial Part 2

I had to jazz up my laptop case somehow. I also had to cover up a seam on the flap that was left because I chose to sew a velcro strip on the case to hold it closed.
After seeing these adorable flowers on this website, I wanted to make my own tutorial (and a few changes).

First, I cut five large circles. I used the base of a fat candle to trace around. Next, I cut four smaller circles. I used the base of a vase to trace around. I made these circles from knit fabric so the edges would not fray. I also cut two leaves from knit fabric (from a project gone wrong...) and selected a button in a contrasting color.

One of the large circles served as the base for the whole flower. I folded the other four large circles into quarters.

I then hand-sewed the quartered circles onto the large circle.

Next, I folded the small circles into quarters and hand-sewed them in the spaces left by the large circle quarters.

I sewed a button in the middle to cover up all my stitching.

To attach the flowers, I decided to use pins (I essentially made them into broaches). I didn't want to sew through the velcro and also thought I'd end up being too messy with my hand sewing and didn't want the messy stitches to show on the flap of the laptop case!

After I hot-glued the green leaf onto the flower, I hot-glued some felt on the back. To finish, I glued a pin onto the back!


Thursday, February 17, 2011

Laptop Case Tutorial Part 1

My outstanding husband got me a laptop for Christmas. My very own laptop! I couldn't believe it. I decided it needed me to make it a case.

This case is made from two inner layers of fleece and an outer layer of cotton fabric, so it isn't going to protect it from all that much; but I figure it should help it not get unnecessarily scratched. Plus, it looks cute!

I sized it as L=(L+H+1") and W=(W+H+1"). My dimensions ended up being 17.5" x 12.5".

Here are the two fleece layers. I stitched around the top of each set and then stitched all four layers together to make the lining. I left an open space at the bottom for turning.
The outer layers are shown below. Go ahead and stitch around three sides, then clip the corners.

The flap (before shaping it to a point):
I wanted to center my velcro. I only had a strip that was 5" or so long, so I centered that strip and then angled the sides down with a ruler.
I sewed around the flap and clipped the corners. I turned it and ironed it flat. Next, I added one velcro strip.

To assemble the whole thing, pin the lining to the outer fabric with right sides together. Add the flap and make sure that the velcro will face the correct way when the case is turned with right sides out. (I did a "test turn" before stitching the top seam. I did jab my hand with the pins, but it saved ripping out the whole seam.)
After stitching the top seam, pull the outer fabric through the hole left in the bottom of the lining.

Before doing any other finishing work, I tested to make sure the computer fit inside the case!
(It did!!)
I stitched up the hole in the lining.

Mark where the other piece of velcro should go.

Top stitch around the upper edge of the laptop case.

There's the case! All done, right? Hmm...

I could have stopped here. But the stitching from the velcro was bothering me.

I was afraid this seam was going to bother me. But I wanted to attach the velcro to both layers of the flap to prevent it from ripping through just one layer.

Here's a peek at how I covered it up. Isn't embellishing so much more fun than plain old sewing? Tomorrow I'll show you how I made and attached the flowers to make my laptop case a whole lot prettier and to cover a nasty (yet necessary) seam.

Tuesday, February 15, 2011

Stuffed Elephants


I made two more stuffed elephants for my mom to give to friends who had babies. I used the tutorial found here.
You can't see it too well, but I put a bow on the light blue elephant's head because it is for a little girl.

Sunday, February 13, 2011

"Lost Sock" Board

My husband's comment to our five day-old son upon arrival home from the hospital, "Welcome home! The dryer has already eaten one of your socks!"
That is an example of how common single socks are at our house.

I decided to make a sock board to combat this problem! I plan to hang it in our new home's laundry room
(when the house is built!)

This is the house so far (and no, it is not the white building in the background):So, based on how far along the house isn't, planning the laundry room's colors may be premature, but I decided our laundry room is going to be pink and brown, to which my husband replied, "The laundry room is going to have a theme?"

I guess we'll have to talk about that later.


Here's my first laundry room creation!


I took a piece of wood, put some holes in it.Then I used mod podge to affix scrapbook paper to it along with scrapbook paper (and then letters spelling out "lost socks") to the front of seven clothespins. I used hot glue to attach the clothes pins to the board.

Then I went a little crazy and made a taffeta flower to 'girlify' the board even further.

I added a wide ribbon and I was all done!
Here's where I got the idea to make this craft in the first place!